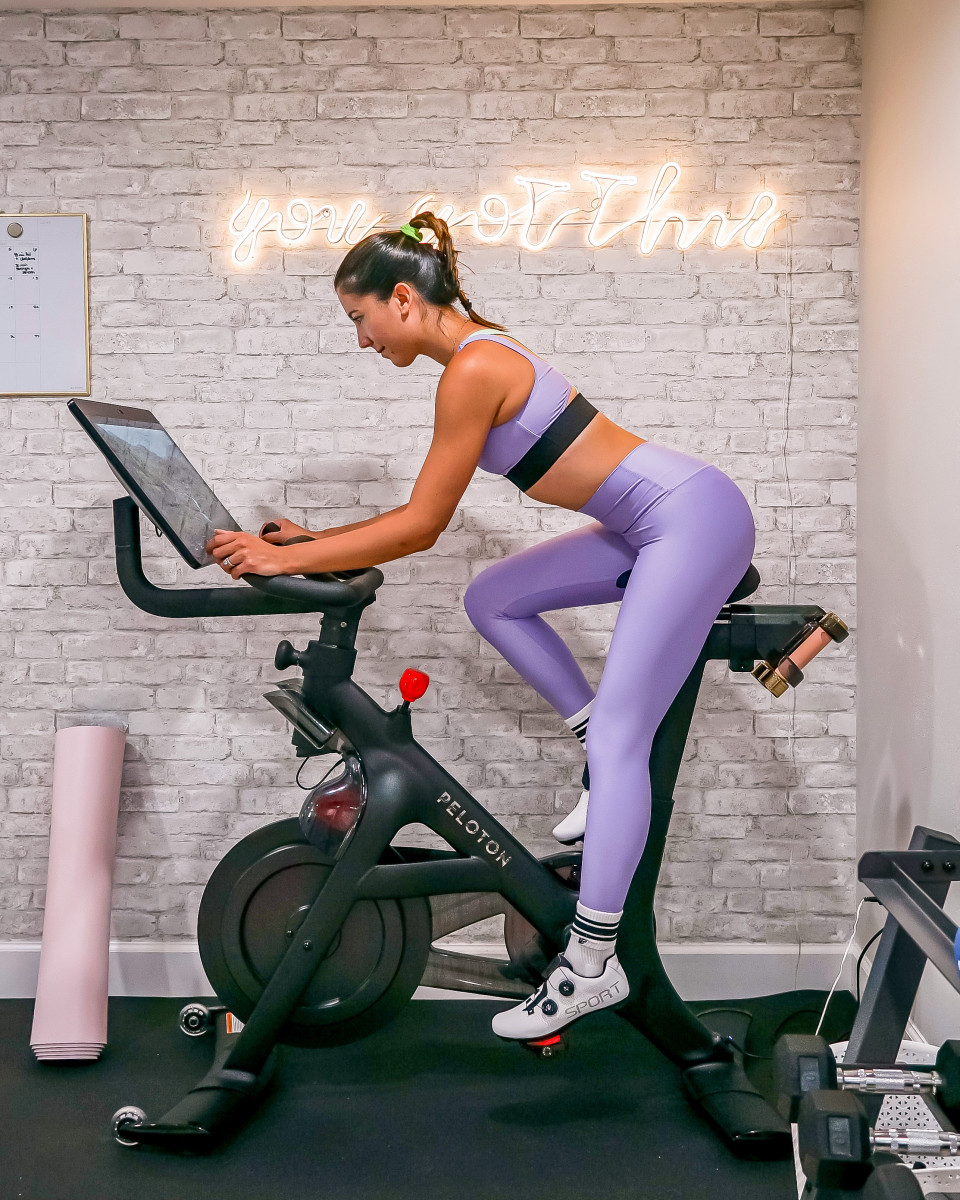
Although I started doing yoga in my first apartment in Florida nearly a decade ago, my true “fitness journey” started in the heart of NYC and it’s many boutique studios. After starting this blog I became a Classpass partner and quickly started putting it to use (shoutout if you’ve been following along since then!). I’d visit several new studios a week and became obsessed with workouts like reformer pilates, cardio dance, sculpt and hot yoga. With access to hundreds of studios and some of the world’s best instructors, working out from home wasn’t really a priority of mine. That is, until March 2020.
When the pandemic shut down NYC I don’t think I owned a single dumbbell. In fact, when my girlfriends and I started doing weekly zoom workouts I had to use cans of beans and wine bottles to improvise for many of the classes. Hey, desperate times call for desperate measures right?
My husband and I eventually invested in a set of small weights but every time I moved our dining table in order to make space for my yoga mat, I dreamed of having enough room for a dedicated workout area. And now here we are, two years later living in Denver, CO with our very first house that we bought and moved into earlier this summer!
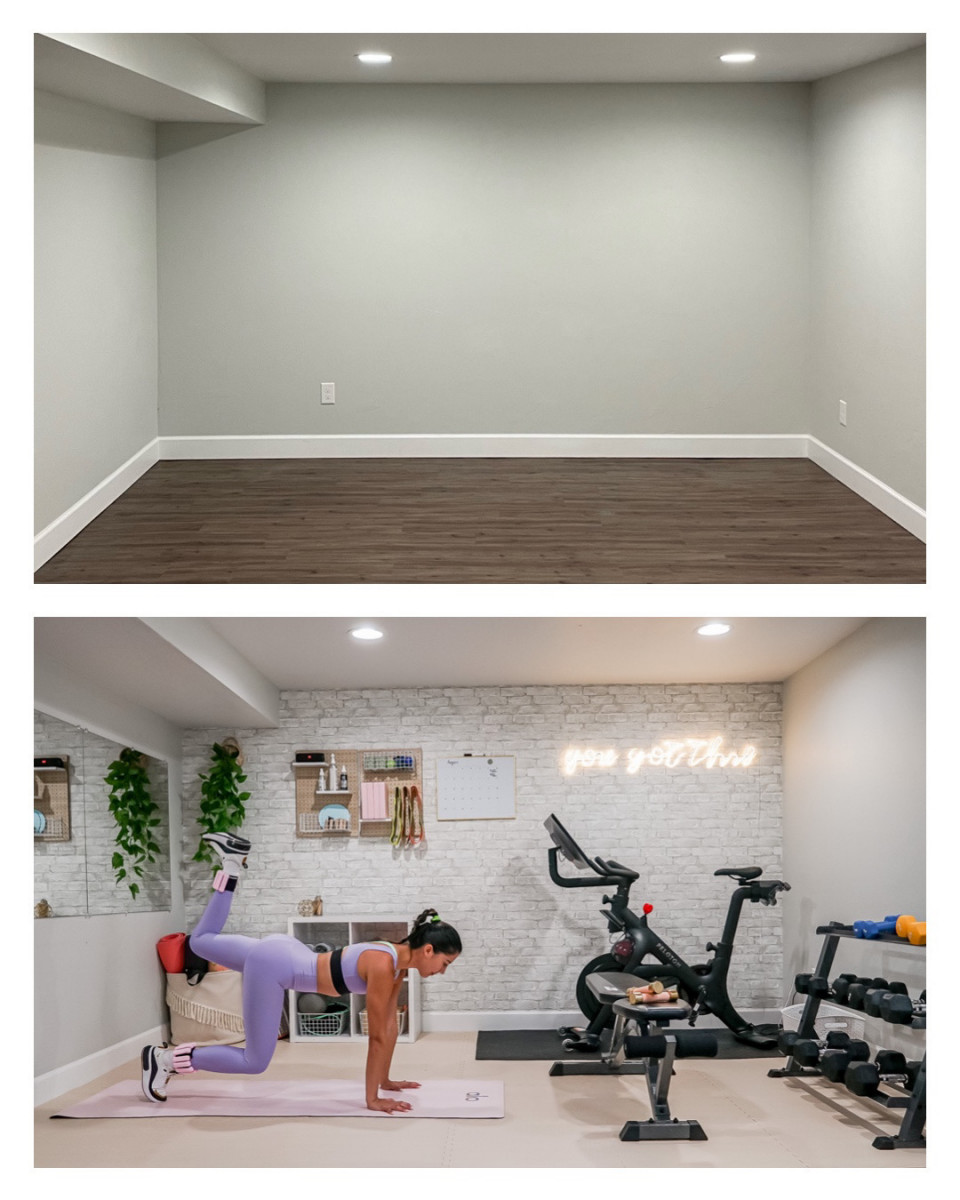
When I first saw the finished basement, I saw a range of possiblities. The back corner with it’s 3 sided walls and high enough ceiling made me instantly think of a home gym. It was just too perfect not to turn it into that kind of space! But the best part about designing your own space is that you can really go wild with how you want it to look. I knew I wanted to add some character, make it chic yet very functional — so I began to brainstrom and sketched out a design.
In July we finally started to turn my vision into a reality and I am OVER THE MOON with how it turned out!! And the best part is, we didn’t have to break the bank in order to make this happen. If you’re curious about the products we used in our DIY home gym, I’ve linked as many things as I could here and went into detail with some of the fails below:
Wallpaper
Since the basement was already painted grey I kept debating whether or not we should paint an accent wall color or just leave it as is. As I was looking for home gym inspo on Pinterest, I kept seeing really cool gyms that had exposed brick. Creating a real brick wall would be outrageously expensive and completey impractical, so I turned to wallpaper instead.
I tried a peel and stick from Target first and it resulted in an epic fail. The walls we have are slightly textured and it was impossible to get the wallpaper to lay flat without bubbling up and creasing all over the place. So, much to my chagrin, we had to scrap the peel & stick variety and start over.
That’s when I decided it made way more sense to invest in real pre-pasted wallpaper and turn to someone from Thumbtack to come and install it. We have never tried installing real wallpaper before and figured it was a worthy investment to get a professional. Which I’m so thankful for because they put it up in less than 2 hours, lined up the brick pattern perfectly and it’s very well done.
I’m SO thrilled with how it turned out! It really transformed the entire look and feel of the space and I’m still amazed at how realistic it looks. It’s incredible what a little texture will do for a room!
Flooring
When it came to flooring, I was a bit at a loss of what we should get. On one hand the foam tiles that I saw everywhere came in lots of colors and textures so would be much more aesthetically pleasing. However they’re not as durable and will indent from the weight of fitness equipment — not to mention you can’t drop any weights on them like you can with rubber.
We actually found a really cool recycled rubber tiling by Nike from Home Depot that we tried out first. And similar to the peel & stick wallpaper, it was an epic failure. Turns out the colors varied quite significantly from package to package and we were left with a very red, green and blue themed floor. As you can imagine, it was very unslightly so we returned all the tiles and I was left at square one.
Thankfully neither my husband or I lift very heavy weights. So when it comes to durability, we felt like the foam would do exactly what we needed to do. I went on Amazon and found some light faux wood looking foam tiles and got to work piecing them together to outline the space. The light color reflects the light and makes the space look a lot brighter than it originally did! And so far the foam has held up really well and adds a nice layer of support for all our workouts.
Equipment and Storage
When it came to the actual equipment that we needed, I’m so thankful that we didn’t need to buy much. The dumbbell rack and bench were new additions from Dicks Sporting Goods but we already had the Peloton. The majority of workouts I do are bodyweight based or use small dumbbells and a mat, so I knew I just wanted to have enough space in our home gym to allow for that.
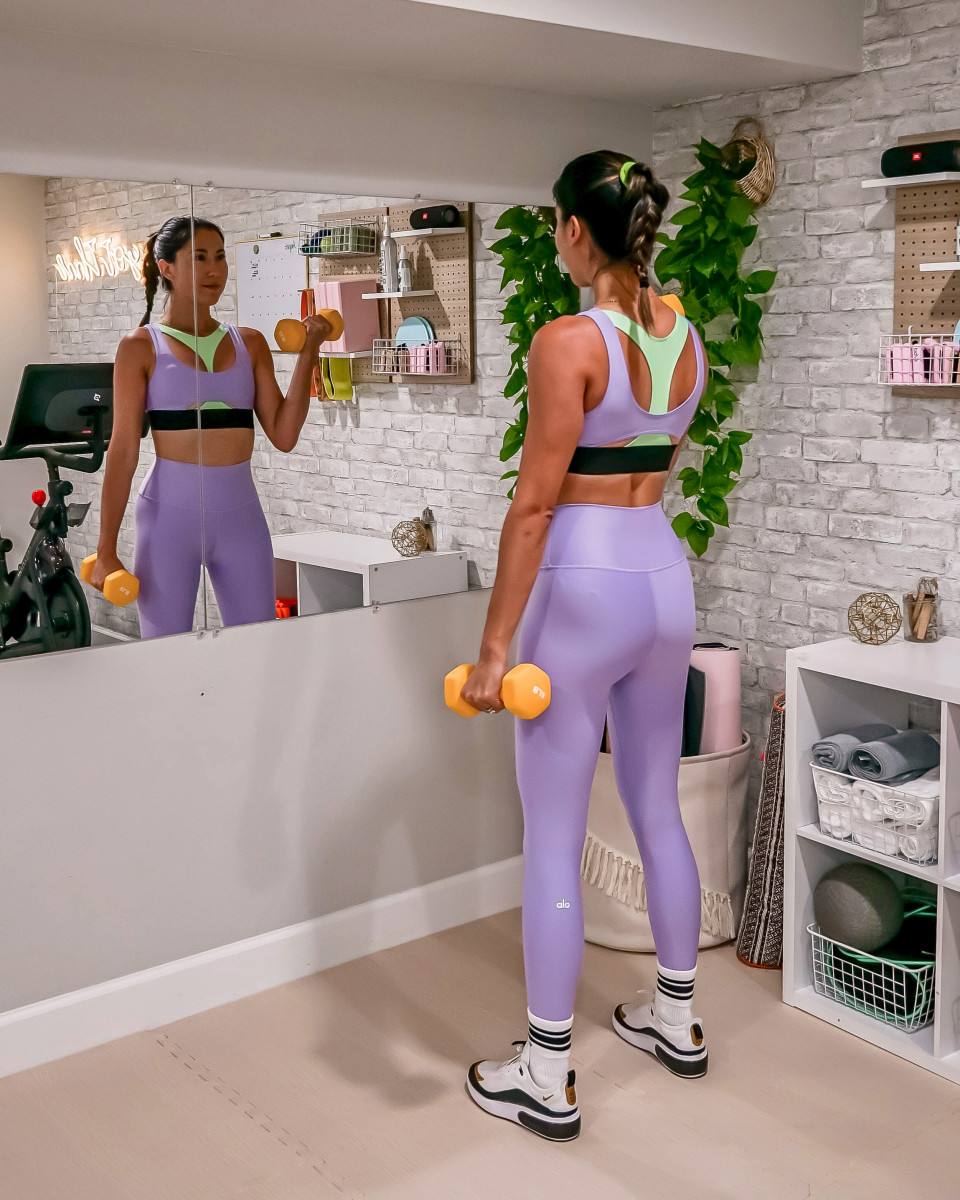
Since I’m currently working on decorating my office, I decided to bring down the white storage cube that I originally was using for all my office supplies and transform it into a gym storage nook. I bought some cheap wire bins from Amazon so that I could fill them with gym towels, jump ropes, TRX tools, a pilates ball and other random workout equipment.
Above the storage cubicle, we hung up two wooden peg boards from Target. They’re super simple but I love that I can easily access my ankle weights, resistance bands, mat cleaners, sliders and more. Not to mention it looks really cute!
For the peloton, we have a small white plastic laundry hamper basket that stores our shoes. And to hold all my yoga mats I used the same big cloth laundry basket that I’ve used for years and placed it in the opposite corner.
Decor and Mirrors
Alright, so following the same trend as my intial messups with the flooring and wallpaper choices, the mirrors we chose aren’t exactly perfect. They’re frameless mirrors we picked up from Home Depot and I definitely measured the space wrong because they’re much smaller than I’d like them to be. However they were very affordable and allow us to see our entire body while working out, so we decided to keep them for now.
I’m a sucker for plants (if you follow me on Instagram this is no surprise) so naturally I had to find a way to incorporate some greenery. I’m not usually a faux plant fan, in fact I generally think they’re pretty tacky BUT with not a lot of natural light in the basement I figured it made zero sense to put a real plant there. Amazon came through with a nice looking fake pothos that I adds a little pop of color with zero watering needed.
Above the Peloton bike I thought a neon sign would look really cool and create a statement. I’m really surprised that Pottery Barn was the place that ended up being the one that had the perfect sign as it’s not usually that kind of store, but I’m SO happy I found it. I love the “You Got This” phrase and it really pops against the wallpaper.
For additional decor we hung up a gold frame dry erase board to help track our workouts and I’ll eventually get around to adding 3 big prints to the opposite wall facing the mirror. But that’s a project for another day!
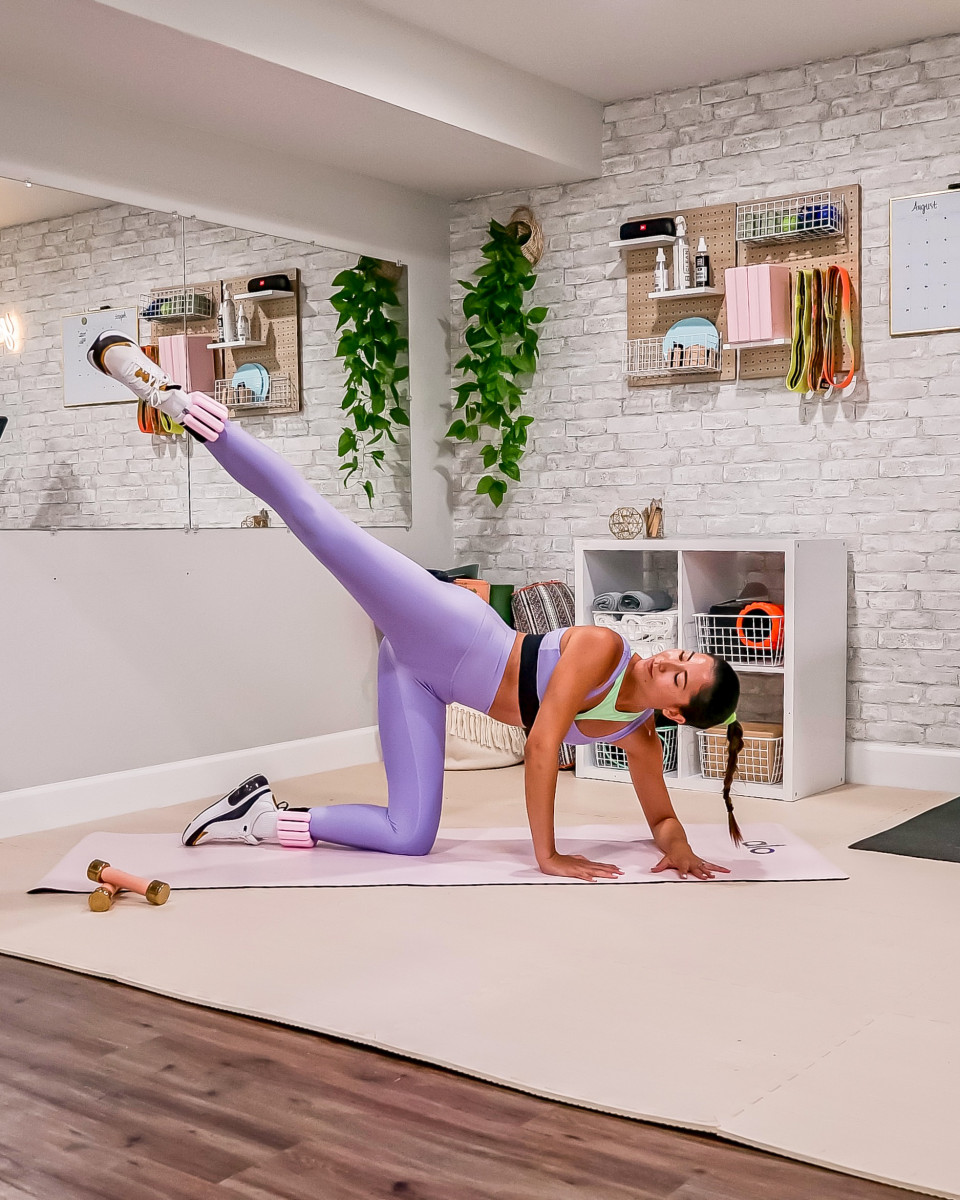
I know it may seem a little extra but having a space like this has made us both genuinely look forward to working out! And I can’t tell you how much I appreciate not having to move furniture around in order to do a yoga flow or online workout class.
I hope you found this post helpful and that it inspires you to create your own home gym in your basement, garage or spare bedroom! And if you’re new here be sure to follow along on my blog and Instagram as I continue to share more DIY projects as we continue the journey of being new homeowners!



LOVE, LOVE, LOVE THIS SPACE! WHAT A BEAUTIFUL AND FUNCTIONAL WORKOUT AREA.
IN FACT, i LOVE IT SO MUCH, yOU’VE INSPIRED ME TO SPRUCE UP OUR WORKOUT ROOM. i HOPE IT TURNS OUT AS LOVELY AS YOURS!
WhIch mat tiles did you get? Can you link them?